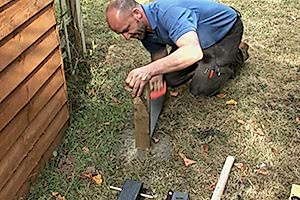
Technical Guide to Installing Fence Panels & Attaching to Posts [UPDATED]
Putting up a fence or repairing old fence posts may seem difficult, but it is actually quite simple. When installing fence panels, all you need is a helper, a few simple tools and basic DIY skills.
The process involves installing fence posts and then the wooden fence panels along the length of the new fence one section at a time. You can use a line of string to keep your fence straight and use gravel boards to help you space out the fence posts. Add a curved or straight trellis or finials for a little design flourish and you're done.
Once complete you can enjoy a sense of accomplishment for years to come.
Editor’s Note [03.05.2024]:
Our technical guide about various aspects of installing fence panels has received a major upgrade today. Most of the content below is new, so enjoy sections about installation preparation, weather requirements, a step-by-step guide to installing fence panels, troubleshooting common fence panel installation issues, maintenance tips for longevity as well as a conclusion.
Fencing installation videos
On the following pages are a collection of installation videos to help you with any problems you might face when installing your fencing.
Watch our YouTube video “Fence panels explained”
The importance of correct fencing installation
If you are going to do a job, do it right. This is certainly true of fencing installation. Getting this right will ensure the functional effectiveness of the fence as well as its safety and long-term durability.
A professionally installed fencing run will last longer and will remain upright and stable even in adverse weather conditions such as strong winds and storms. A fence brings more than durability though, it defines a boundary, provides privacy and noise reduction, and delivers safety and security for children, pets, and valuables.
Additionally, of course, there is also aesthetic appeal. With a range of traditional and contemporary fencing style options to choose from, these add to the "curb appeal" and even the property's value. After all the garden and its fencing are the first impression visitors get of a house. Do not forget though that prior to installation it is necessary to check the legal compliance of your fencing project and if you have any doubts check with your local planning authority. We would always advise discussing your plans with your neighbours too, as you do not want any long-term boundary disputes.
Working assumption
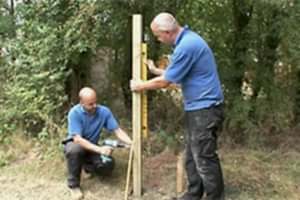
This article is focused on installing fence panels, there is a working assumption that the fence posts and fence post hole are in place and ready to attach to panels. We do cover how to attach fence panels to posts later, but that is the only real focus on fence posts in this article.
For detailed about how to install timber fence posts, click on either:
1) How to install a fence post into concrete
2) How to install a fence post into soil
Preparation – tools, equipment, materials, and supplies
As a part of preparation, we recommend having access to the following tools, equipment, materials, and supplies.
Tools
Make sure you have the following tools available for fence panel installation:
- - Drill
- - Hammer
- - Post level
- - Saw
- - Screwdriver
- - Spirit level
- - String line
Other equipment
The following other equipment will prove invaluable:
- - First aid kit
- - Paintbrush or roller
- - Safety equipment – safety goggles, and work gloves
- - Tape measure
- - Wheelbarrow
Additional materials and supplies
Most of the following supplies and materials will be needed (this can vary by project):
- - Fence panels
- - Nails or screws
- - Paint or stain
- - Rubble bags
- - Timber battens
- - Timber for bracing
- - U-brackets
- - L-brackets
- - Wood preservative or sealant
- - Wood screws
Weather requirements
The good news is that installing garden fence panels is possible in most weather conditions. We always advise you to check the weather forecast one to two days before the project and for the next few hours when you intend to start.
We advise not undertaking fence panel installation in the following weather conditions – extreme cold or frost, extreme heat, heavy rain (or hale), lightning storms, snow and/or ice, and strong winds.
Step-by-step guide to installing fence panels
Use our easy-to-follow step-by-step guide below when installing fence panels:
Gather supplies
Before you start, ensure you have all tools, equipment, and other supplies in place. It sounds obvious, but ensure you have enough daylight hours left to complete the work, as fence panel installation is much more difficult after dark.
Measuring and marking
You will first need to measure the distance between each fence post and make sure it is accurate for the width of your fence panel, the UK standard width being 6'. On each post, mark where the top and bottom of each panel will be placed. This will be to the precise height measurement of your fence panels (typically between 3' and 6' high). Ensure markings are level between posts before you proceed.
How to attach fence panels to posts
The process of how to attach fence panels to posts is a case of place, secure, and repeat until your fencing run is complete. The process is described below:
1) Place the first panel
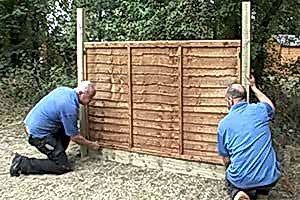
Simply now place the first panel in position between the first two posts using a spirit level to ensure the panel is placed straight.
2) Secure the panel in place
Secure the panel to the marked position using either brackets or screws/nails:
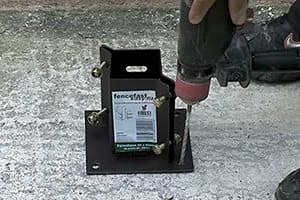
- - Attach brackets to posts - attach the U-brackets or L-brackets, place the panel into the brackets and secure in place with screws
- - Directly screw or nail - if not using brackets, directly screw or nail the panel into the post
- - Check the alignment - use your spirit level to ensure the panel is vertically and horizontally level. Make any adjustments needed until the alignment is accurate
3) Repeat the securing panel process
Simply repeat the above process for however many panels you have. As you move to each new panel ensure it is fully aligned to the previous panel. Once happy with alignment, repeat the securing process and then recheck alignment
Final checks
Once your panel fence run is complete, inspect all connections, ensuring everything is correct including final alignment.
Apply any final changes
These could include:
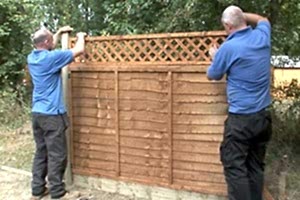
- - Adding a post cap, finials, fence toppers, etc.
- - Paint or stain - apply a coat of timber treatment - paint, stain, or sealant as needed. This is particularly, the case for dip treated fence panels
Cleaning up
Dispose of any/all waste materials such as previous fencing, scrap parts and packaging materials, etc. Leave the area looking neat and tidy, so the surroundings look as neat as your new fencing.
Troubleshooting common fence panel installation issues
Regrettably, there are many common fence panel installation issues, we summarise some of them below, forearmed is forewarned!
1) Failure to clear the area
Clear the area of any rubbish or debris first, this reduces the likelihood of trip-ups and accidents.
2) Failure to take safety precautions
Fence panelling installation involves certain risks including handling heavy objects, use of tools (sometimes power tools), possibly working at heights, etc. A failure to take adequate precautions and use the safety equipment we suggested earlier could cause damaging health issues.
3) Failure to use consistent panels
We have seen this, where a homeowner uses two or more fencing panel types, styles, and/or sizes. This is aesthetically displeasing and should be avoided at all costs.
4) Inadequate resources
Check our tools, equipment, and supplies list detailed earlier BEFORE you start work.
5) Installing in bad weather
Do not risk it, only install in good weather conditions. Strong winds, driving rain or muddy and wet conditions just make the job harder than it needs to be.
6) Levelling issues
We emphasised levelling during our step-by-step guide detailed above. A failure to level is mainly a cosmetic issue and will undermine your enjoyment of the fencing run.
7) Local authority issues
Avoid planning permission issues with your local planning authority later by checking the guidelines specific to your property (for further advice about fencing law (especially fencing height) click here.
8) Not leaving enough daytime
Always allow enough time to complete the work before darkness, as a rough estimate the time needed is:
- - Less experienced, DIYer or more challenging environment - (e.g. slope, lack of tools) – 40 to 50 minutes per panel
- - Skilled and experienced fencing installer – 20 to 30 minutes per panel
9) Not seeking help
Unless you are an experienced fence installer, we would recommend having help. This is needed for tasks such as fence panel handling and positioning, levelling, and alignment.
10) Panel orientation issues
Beware of installing panels upside down or backwards (it happens). Although this is safe and will act as a barrier to an aesthetic appearance it is unsightly.
11) Post spacing issues
Although our focus here is fence panelling if the fence posts are improperly spaced the fence panelling work will not be possible. Always address any fence post spacing issues before commencing fence panel installation.
12) Rushing installation
Take your time, the work you do today will last for many years, and the priority always must be quality over speed of completion. Get the job done right, first time, every time!
13) Securing issues
A failure to adequately secure brackets, nails, or screws will cause issues later, particularly when storms arrive.
14) Using damaged materials
Never use panels (or posts), which are damaged before you start (possibly due to storage issues), always get these replaced.
Maintenance tips for longevity
Maintenance is always focused on “prevention is better than cure.” Simple actions you take today could prevent medium-long-term damage to your fencing panels.
We cannot emphasise enough the value of regular and routine inspections, in everyday life these can often get overlooked, so we recommend diarising these, so you do not forget. A minimum of two to three fencing inspections per year is recommended.
What do you look for in a maintenance inspection? Well, some of the issues mentioned above might arise. So, clear any debris from the area, if panels are no longer level, then get your tools out to ensure there is a straight line. Fixtures such as brackets may become loose and should be resecured.
In addition, look for signs of rot, decay, and fungus. If you spot these signs, clear them off the panel and reapply high-quality wood preservative. For dip treated fence panels, this needs to be an annual process. For pressure treated fence panels, this should not be necessary until the panels are 10+ years old when you will need to inspect them and apply wood preservative if needed.
Conclusion: your DIY installation success
As we conclude our article, we expect you can plan your fencing panel installation with a likely successful outcome. Remember fencing has multi-purposes including playing a functional role, defining a boundary line, providing aesthetic appeal, and keeping loved ones and valuables safe and secure. Install with the long-term in mind and expect your fencing projects to last for 15+ years at least. Before you commence your installation, check your fencing run is legal and you have discussed your plans with your neighbours.
Our article focuses on fencing panel installation only and has an expectation that the fencing posts are already in place. Read our essential supplies section carefully to understand the tools, equipment, and other supplies you will need before you commence the project. Always install in favourable weather and avoid extreme conditions like strong winds, heavy rain, or intense heat. Commence work at a time when you will comfortably finish during daylight hours.
Read our step-by-step guide to installing fence panels for everything you need to know including the often tricky task of how to attach fence panels to posts. We conclude with maintenance tips, so that you can keep your handsome new fencing looking great for years to come.
Contact us
We hope you have enjoyed this technical guide; we suggest reading some of our blog articles for additional information and guidance. Speak to Buy Fencing Direct about our fencing range and installing fence panels.
Contact methods available are:
- - Phone calls - 0333 003 0515
- - E-mails – use our contact form
- - Text chat – text talk with us in real-time when you use our text chat app


